Cheap, easy and quick; making your own kaleidoscope is a great activity to do with the kids. It took us about 20 minutes to gather the materials together and make 2 kaleidoscopes and the kids were very impressed with them.
Showing posts with label tutorial. Show all posts
11 August 2013
30 November 2012
Recycled Christmas Pompoms
Mr 5's school class are making a Christmas tree decorated entirely in things made from recycled material. Here's a tutorial for some chocolate wrapper pompoms I came up with.
Take 2 empty chocolate wrappers.
Cut them in half.
Pile them together and use a small piece of sticky tape at each end to stop them from getting away from you.
Carefully cut small slits on each side of the wrapper. The slits need to stop just before the centre line (so that you don't end up with many small strips of wrapper).
Roll the wrappers up.
Tie them up with a piece of string or wool, pulling them together as tight as you can.
Fluff them up, and they're ready to hang!
25 July 2012
Toilet Roll Doll's Dresses
The other day the kids wanted to make some dolls to act out some stories using the story box Miss 3 and I had made. We made toilet paper roll dolls, and I thought I'd share how I made their very quick and very easy dresses.
1. Cut a strip of paper from an A4 sheet, the full length of the sheet, and about 10cm wide.
2. Fold it in half.
3. Cut a small slit at one end, about the width you'd like the dolls arm to be.
4. Fold the paper below the cut over, making a triangle, and sticky tape in place.
5. Slip the toilet paper roll into the dress to measure how far to make the arm cut on the opposite side, and then cut it.
6. Fold the lower corner over and sticky tape it in place, in the same way as before.
7. Cut a small scoop for a neckline.
8. Put the dress on the toilet roll, and draw a face on.
Mr 5 thought they needed legs too.
24 July 2012
Flower Glasses Brooch
This
little glasses brooch is a design that originated from my Grandmother.
She cleverly made one for herself years ago, using a brooch she had,
which conveniently had a loop that she could fit a key ring onto.
Unfortunately the brooch broke and was unrepairable, and she couldn't
find any new brooches that she could fit her key ring to. I thought that
sounded like a very satisfying little craft project and got to work.
The basic idea is a brooch with a small key ring loop that you slip one
leg of your glasses through, so that you can hang your glasses on your
shoulder and easily find them next time you need them.
The thing I like coming up with is the pretty bits. For this brooch I wanted to make a white flower.
First
I got some pretty white material. I cut a rectangle of the material
approx. 10cm x 15cm. I carefully melted the edges a little with a
lighter to stop it from fraying (taking care to not set anything on
fire!). I've worked with this material making a skirt a while back, and I
know how easily it frays.
Next
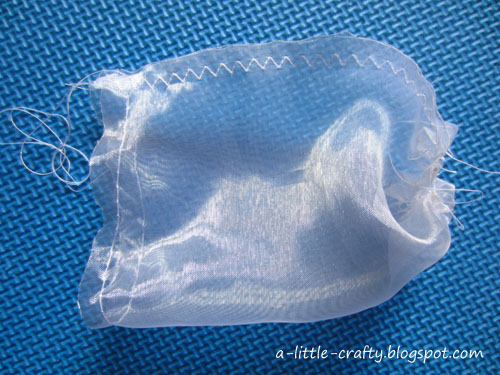
I sewed the two ends of the rectangle together with a zigzag stitch to
make a loop. I sewed in two running stitches at the top and bottom of
the loop (long stitch length and no doubling back to secure the thread
at the ends) to use for gathering .
I
turned the loop right side out, so the zigzag stitch was inside the
loop, and sewed another running stitch to gather the fabric across the
middle.
I
pulled the running stitches until the fabric was nicely gathered and
looking reasonably flowery, then tied the threads in a knot and used hot
melt glue to glue a button on top, securing everything in place.
Next
I took a length of white ribbon, just long enough to allow the key ring
to peak out from the bottom of the flower, and melted the ends of the
ribbon to stop it fraying.
Finally,
using a hot melt glue gun, I turned the flower over and glued the
ribbon (with ring) in place and the brooch pin over the top of it.
Finished.
15 May 2012
Butterfly Craft
I saw this being done at the local museum a while back, and adults and kids of all ages were all really enjoying it.
![]() |
| Draw (or trace) an outline of half a butterfly, with a dashed fold line down the centre. |
![]() |
| Fold the paper down the fold line, and cut around the butterfly outline |
![]() |
| Punch a hole in the centre of the fold line |
![]() |
| Cut shapes from coloured paper and glue them on to decorate your butterfly. You could also use pens, paint, glitter, stickers, etc. |
![]() |
| Take a chenille stick and twist it to give a finger-sized hole |
![]() |
| Thread the legs of the chenille stick through the hole in the centre of the butterfly. The finger loop should be on the plain side of the butterfly. |
![]() |
| At the head end of the butterfly, fold the chenille stick over the edge of the paper |
![]() |
| Top side |
![]() |
| Bottom side |
![]() |
| Ready to fly! |
Subscribe to:
Posts (Atom)